Unlike many people, I’ve learned to appreciate April Fool’s Day. I blame that entirely on my father. I’ve been the “victim” of his tom foolery since the day I was born. For example, Christmas Eve night, circa 1985. I had just turned 11, and I believed in Santa. A LOT. I went to bed early that night to make sure Santa had the “all clear” if he needed to drop off our presents early. I lay there in the dark battling my excitement and trying to will myself to sleep. We lived in a rural area, and my dad is/was an avid hunter. His game of choice: deer. Especially the huge male ones. My dad’s desire to kill such an animal exponentially grew with the number of points it had (I’m still not sure what that means) and/or the size of its rack. So when I heard the sound of a gunshot followed by my dad excitedly screaming, “I got one! I got one! And its nose is red!” I took it seriously. I leapt from my bed and started to run for the front door. I don’t believe my feet even touched the ground. My mind was racing, wondering how in the world I was going to convince Santa to keep our house on the “houses to receive presents” list when our halls would be decked with the head of a dead animal that possessed a conspicuously obvious red nose. When I finally got to the door I saw my dad doubled over in laughter while my mom scolded him “Gary Lynn! Stop it! Don’t do that to those babies!” I quickly realized this was just another one of dad’s tricks. I won’t lie. Relief over not having to do some serious Santa ass kissing covered me like a warm blanket.
Needless to say, I’m glad I turned into a food blogger instead of a serial killer. I still love a good prank, however I don’t advocate involving guns or any other weapons in your tricks. It’s not 1985 anymore, and while I enjoy a good story and a hearty laugh, the prank loses its allure about the same time the handcuffs click shut, so choose your pranks – and your victims – carefully. To help you with that, I’d like to share with you a tasty way to fool your friends and loved ones without risking your relationship with them. In fact, they may even ask you to fool them more often! Introducing:
Mock fruit pies have been around since the Great Depression and World War II. During the Great Depression they helped stretch a family’s food budget by using ingredients that were cheaper to come by. There was a resurgence of these types of dishes during World War II, when fresh fruits and vegetables were being sent to our soldiers at war. Most families started what was known as a “Victory Garden”, however it was impossible for a family to grow every fruit and vegetable they needed, especially when some of the produce takes years to mature well enough to yield edible items. What happens when times get tough? We improvise, especially when it comes to foods we crave.
Enjoy!
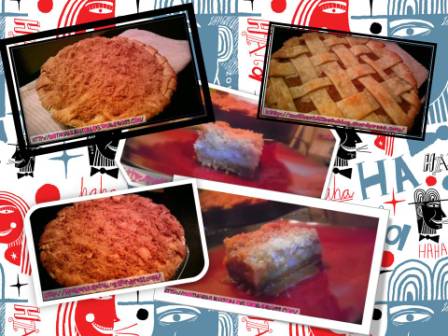
MOCK APPLE PIE
For the pie
- 2 cups water
- 1¼ cups sugar
- 1 sleeve saltine crackers
- Butter (for dotting. Approx 4 TBSP)
- Ground cinnamon (for sprinkling)
- Cloves, coriander, allspice, nutmeg (optional)
- Unbaked double pie crust (I used two premade frozen pie shells)
For the streusel
- 1/3 cup light brown sugar, packed
- 1/3 cup granulated sugar
- 1 cup all-purpose flour
- 1½ teaspoons ground cinnamon
- ¼ teaspoon kosher salt
- 6 tablespoons unsalted butter, melted
- Caramel sauce, optional (I used ice cream topping, but you could also make your own)
Preheat the oven to 375˚F.
Make the streusel. Whisk together the sugars, flour, cinnamon and salt in a medium bowl. Pour in the melted butter and mix with a fork until the ingredients are well blended. Set aside.
In a medium saucepan, stir together the water and sugar and bring to a boil. Add the saltines, and boil for 1 minute. Remove from heat.

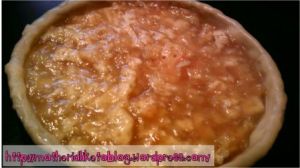
Sprinkle a thin coating of streusel on the pie crust. Carefully spoon the soggy cracker filling into the pie shell. Dot the top of the filling with butter (I used 4 TBSP cut into small pieces). Sprinkle on the cinnamon (and any other optional spices) to taste. I also sprinkle another thin layer of the streusel topping at this point as well. Reserve the remaining the streusel.

Adding more cinnamon is never a bad idea. Sprinkle some on top of the filling before you put on the top crust. Your taste buds will love you for it.
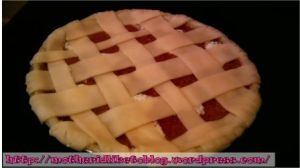
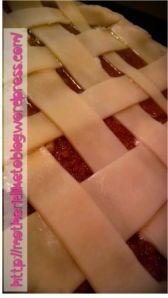
Lay the top crust over the pie filling and crimp the edges, and use a knife to cut several slits in the top crust. You can also use a lattice design for the top crust.
Bake the pie for 25 minutes.

Looks yummy even at this stage. You can stop here if you don’t want the added sweetness of the streusel topping. However, you’ll still need to bake your pie for 40-45 minutes, so don’t literally “stop here” if your pie has only been in the oven for 25 minutes.
Remove from oven and sprinkle the remaining streusel over the crust.
Return pie to the oven and cook for an additional 20-25 minutes until the streusel is brown.
Remove pie from oven and let it cool completely on a wire rack before cutting it so the filling can firm up (approximately 2 hours. You can speed up this process by letting it cool for 30-40 minutes on a wire rack and then cool in the refrigerator for an additional 30 minutes). Before serving, drizzle the pie with caramel, if desired.
MOCK DUTCH APPLE PIE BARS
Ingredients:
For the Crust:
2 cups finely ground graham crackers
1/3 cup granulated sugar
1 TBSP brown sugar
¼ tsp salt
½ tsp cinnamon
6 tablespoons unsalted butter, melted
For the Streusel:
1 cup all-purpose flour
1/3 cup light brown sugar
1/3 cup granulated sugar
6 tablespoons unsalted butter, melted
For the Filling:
2 cups water
1 ¼ cups sugar
1 sleeve saltine crackers
Unsalted butter (for dotting)
Ground Cinnamon (for sprinkling)
DIRECTIONS:
1.Preheat oven to 375 degrees F. Line a 9×13-inch baking pan with foil or parchment paper, allowing excess to hang over pan edges. If using foil, grease or spray with non-stick cooking spray.
2.Make the Crust: Finely crush the graham crackers and mix in the sugars, cinnamon and salt. You can also use a food processor until everything has been reduced to fine crumbs, about 15 seconds. Place mixed dry ingredients into the pan you will be baking the bars in. Add the melted butter and stir. Once the crumbs are saturated, press the crumbs into an even layer in the prepared pan and bake until deep golden brown, 10 to 13 minutes. Cool on a wire rack for 20 minutes. Keep the oven on.
3.Make the Streusel: Whisk together the dry ingredients (flour & sugars) in a medium bowl. Add the melted butter and toss with a fork until the dry ingredients are all evenly moistened. Set aside.
4.Make the Filling: In a medium saucepan, stir together the water and sugar and bring to a boil. Add the saltines and boil for 1 minute. Remove from heat.
5.Assemble: Carefully spoon the soggy cracker filling onto the crust. Dot the top of the filling with butter (approx. 4 TBSP cut into small pieces) and sprinkle on the cinnamon to taste. Spread the streusel over the top. Bake until the streusel is brown, 25-30 minutes. Cool completely on a wire rack, about 2 hours. Remove bars from pan and cut into squares. Store in an airtight container. May be refrigerated or kept at room temperature.
Optional: May drizzle caramel ice cream sauce or melted peanut butter over the top to serve.


